Kitesurfing Beginner – Preparations before the kite course
Is there anything to think of before you attend a kitesurfing course?
To come unprepared to a ktiesurfing course is totally fine, you will still learn. But for the one who wants to get out most possible from a kitesurfing course then it doesn’t hurt to study a bit of theory and perhaps even practise flying with a trainerkite for an hour or two. A kitesurfing course consists of several different elements of varying difficulty. With some self studies you’ll get an insight and understanding for the first relatively harmless elements whereupon one can focus on those elements that are harder to be prepared for.
A kite course always start with a short theory lesson where we do a so called spotcheck. We rig a trainer kite after the spotcheck which you’ll will fly while exploring the wind window. The following elements in the course where we rig and launch a big tube kite requires both equipment and professional instruction why we at Gusty strongly dissuade you from doing this on your own. But lets take a closer look at those first elements in the course.
Spotcheck
Imagine that you as a beginner just have taken a kitesurfing course and are about to kitesurf on your own for the very first time. You go to a beach where the wind is blowing. Hopefully you’re not alone and you see some other kiters in the water and some on land. You rig your kite, jump in the wetsuit and are ready to enter the water. You can control your kite and everything seems calm, no need to worry… or? The purpose with a spotcheck is to eliminate eventual doubts and reasons to worry by observations and preparation to give you a safe kite session. In short a spotcheck means that you check the surroundings to see if there are any eventual hazards. The area where you are is divided into three elements – sky (wind), water and land.
- Sky. You don’t have to be a meteorologist to kitesurf, but some understanding for what a sudden weather change can lead to for the one that has a kite in the air can save your life. Now and then you read news about persons that have been blown up on land when kitesurfing. Just google and you’ll find some nasty stories. Read some about weather and wind and what can happen when for instance a cumulonimbus cloud appear in the horizont. Learn to read a wind and weather forecast.
- Water. Everyone that kitesurf crash in the water from time to time. Beginners since they havn’t developed their skills fully. The advanced riders since they try to learn new tricks and push the boundaries. Most often it’s not worse than you getting an involuntary gulp of water as you crash in the relatively soft water. But what’s hiding beneath the surface? Even though the bottom appears to consist of fine sand there might stones and other junk. In you unsure, then ask someone that knows the spot where you plan to kitesurf. It’s not fun to crash right where that single stone is hidden on the bottom! Even sandbanks and very shallow water can be treacherous, to get stuck with your board riding in full speed is not fun.
Is it ok to go kitesurfing wherever you want? Some places have bath/swimming zones and nature reserves where kitesurfing is forbidden. Kitesurf at these places and there is a risk that kitesurfing will become forbidden everywhere. Other kiters will probably not frown upon you in case this happens… - Land. Most kite accidents occur on land in connection with a kite that someone land or launches. If possible rig your kite close to the water at a place where there is plenty of space inwards land. To launch a kite can feel a bit scary the first times you try it before you have the confidence to do it perfectly. In case you screw up then you might be dragged a couple of ten meters on the beach. Hopefully you’ll get away with a few scratches and a mouth full of sand. Imagine the consequences in case you crash the kite in the head of the child building a sand castle close by. To kitesurf is a bit like driving a car on a pedestrian street, you have to give right to everyone else. Make sure that you have margins when you land and especially when you launch your kite. Go out in the water in case you are unsure.
Spotcheck is about your and others safety. Never understimate the wind and don’t overrate your own ability. Be aware of eventual risks.
Trainer kite
A trainer kite is a small so called foil kite – a kite that you don’t have to pump up with air. Instead the trainer/foilkite has cells that are filled up with air. Trainer kites are available in sizes from about 1m² – 4m². The force generated in the trainer kites (particularly the smaller trainer kites in sizes of about 1-2m²) will not come close to the force that can be generated in a big tube kite why they are well suited for the one who wants to practise on his/her own. Moreover, trainer kites are endurable and “soft” in a way that the air will be pushed out of it when it crash and collapses. The simplest trainer kites often comes with a 2-lines construction and to a low price. You can have fun with a trainer kite of this type yet learn to manouver a kite and get an understanding for the wind window. The more advanced trainer kites typically have 3 or 4 lines and better aerodynamic performance. The also have the potential to create quite a lot of power for its size. On the downside these kites are also a bit more expensive.
No matter how much you practise, you can with a trainer kite unfortunately not develop the skills you need to pilot a big tube kite. A big tube kite has a much more developed security system, other flying characteristics and more functions. It’s like comparing a wheel supported bicycle with a motorbike. By an excessive use of a trainer kite it’s possible that you’ll you get bad habits that will be hard to break as you switch practising with a bigger tube kite, so practise in moderation. Nevertheles, if you have the economy and the time to play around with a trainer kite before a kite course, then go for it as you’ll have better prerequisites to learn how to handle a large tube kite faster.
There is a whole variety of trainer kites on the market. Google for “trainer kite” and you will for sure find dozens of sites that are selling trainer kites. So which one to choose? The trainer kites can be divided into two categories.
- Two-lines trainer kites
- Three/four-lines trainer kites
Two-lines trainer kite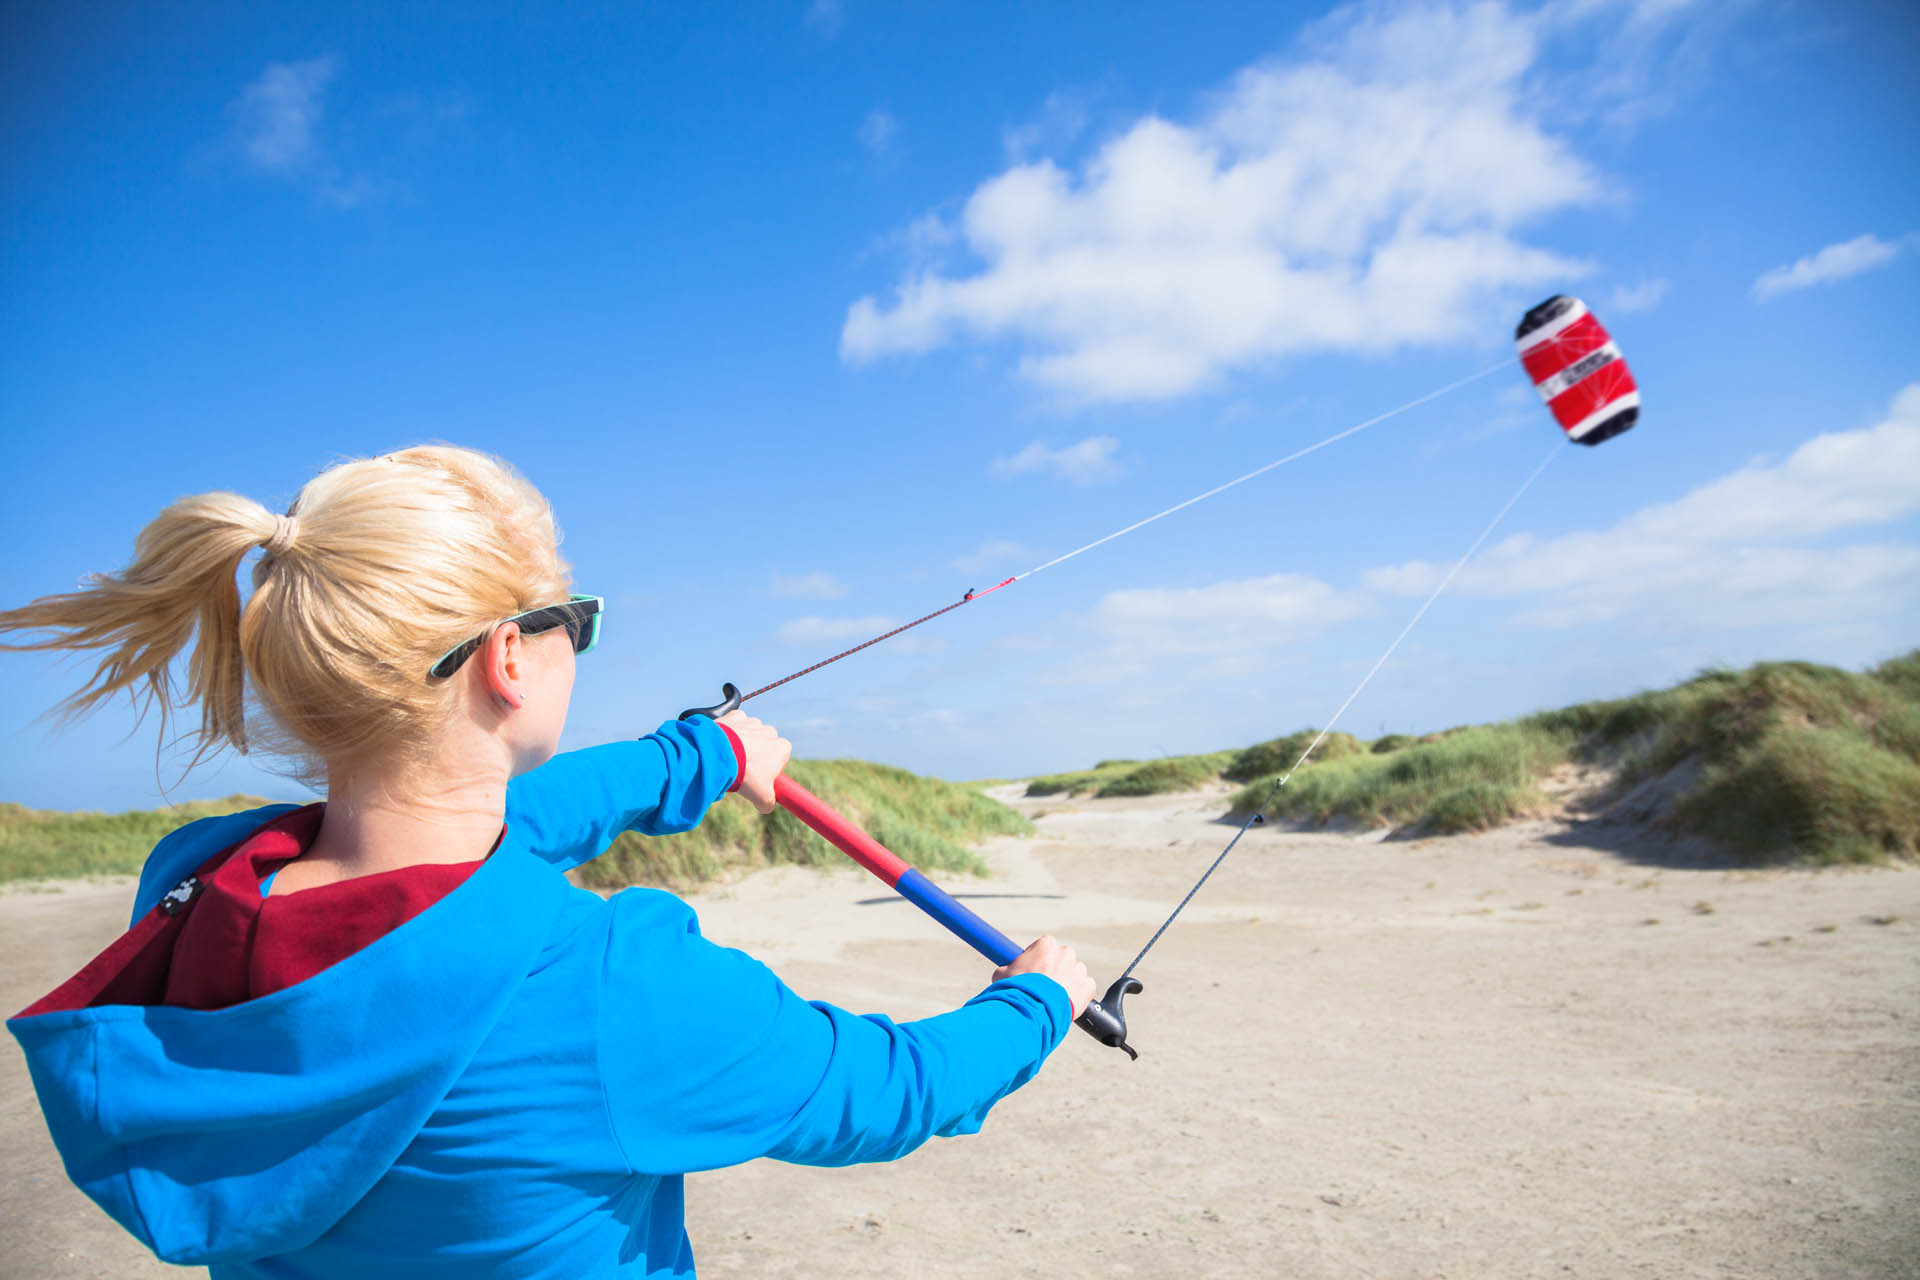
Inexpensive and simple. If you don’t want to spend too much money then a two-lines trainer kite is your best option. Perhaps do you also have kids that want to play with the trainer kite and, whom you fear, will give the kite a pretty rough ride… in that case the two-lines trainer kite probably is the best option. Since the generated power in these kites are low compared to a three/four-lines kite then these kite are more suited for kids or light weight persons.
Three/four-lines trainer kite
 A trainer kite with four lines have two backlines and two centrelines. The centrelines are connected to one single lines close to the control bar. So looking at the control bar only it will look like you have three lines, hence the somewhat confusing description three/four-lines. Another advantage part from its better aerodynamical characteristics is that this kite is easier to relaunch when you crash it. So you don’t have to do all the legwork to put the kite in launch position every time you crashed it. For certain some skills is needed to relaunch a trainer kite, but you might be a fast learner? The price tag for a kite with four lines is for obvious reasons higher than a trainer kite with two lines. On the other hand it will most likely be much easier to sell a four-lines trainer kite on the second hand market.
Here is an excellent video that shows how to fly a trainer kite in the wind window in a simple and easy to understand way. Another good source where you can study before attending a kite course is Youtube where you’ll find tons of tutorials that explains everything from how to fly a trainer kite to how to make all kind of crazy tricks.
Wind window
 The wind window is the three dimensional quarter sphere where we can fly the kite. You can create more or less power in the kite depending on where you position your kite in the wind window. The edge of the wind window is the green area in the image. You pilot the kite by using the control bar, just like a handlebar to a bicycle. Steer the kite nice and easy along the edge of the wind window and you’ll have a minimum of power in the kite. The numbers along this edge correspond to different times in a clock. When the kite is positioned in zenith then the kite is positioned in 12 o’clock. We find 9 o’clock on the left side all the way down at the ground/water while 3 o’clock is all the way down on the right side. The point of using times is that it’s very easy to describe how to pilot a kite in every given moment. For instance, pilot the kite quickly from 11 to 12:30 to achieve a lift (the technique to make a jump). As you can see in the image there is a red zone called power zone. This zone is called power zone simply because we can generate a maximum of power in the kite as flies in this area. Keep the kite still without steering it in any direction and you’ll find that it always moves towards the edge of the wind window, the angle between the kite and the wind gets smaller (the angle of attack is reduced). Similar as to going upwind with a sailingboat into the eye of the wind. So if you quickly want to reduce the power in a kite then just stop manouver it. If you on the other hand steer the kite more aggressively, then the kite will go further down in the wind window and, if you want, down into the powerzone. Enough talking about the wind window. If you’re interested in aerodynamics, how and why we can create power in a kite, then you can read more about it under kitesurfing – this is how it works
.
Here is another video that describes the wind window as well as some other fundamental yet important things. You’ll learn all this in reality during a kite course at Gusty.
Conclusion and other tips
Spotcheck, wind window and trainer kite are three things that can give you a head start the day that you attend a kitesurfing course. Another thing you can do is to open up youtube in your browser and search for “kitesurfing beginner” and you’ll find a whole variety instructional videos. Even better is to go to the beach on a windy day when there are kitesurfers in the water. Observe and visualize. If you have questions or thoughts just ask people on the beach. Kitesurfers are most of time friendly and helpful souls that only gets happy when someone asks them something so that they can shine with their knowledge 😉
D-day
Regardless if you’ve done your homework or not, hopefully there will be a day when you’ll attend a kitesurfing course.
I’m often asked about practical details before a kitesurfing course. Above all when it comes to things to bring to the course, so here follows a short list of things to bring.
- Sunglasses – Comfortable to have as we fly the trainer kite.
- Sunscreen – believe me, a full day in the water without sunscreen won’t feel nice afterwards.
- Food – Your energy level will not last for 5 hours unless you eat something.
- Towel – Partly for when you get change, but also since you’ll get wet from the water, even with a wetsuit on.
Time and location
Another question is about time and location. It’s meaningless to ask for time and location several weeks before a course. A booking is always preliminary and should be seen as so until the day before or even until the morning on the actual that we intend to hold the kite course. The thing is that the weather forecasts constantly change and it will in a best case scenarion be possible to sort of tell what the wind will be like 4-5 days in advance. Today the forecast may say that tomorrow will deliver 5 m/s, but tomorrow it turns out that the wind only is blowing 4 m/s which makes it hard to teach a class. However, if the wind forecast says that it will be 8 m/s in three days then we are in a better position since we still can deal with a slight deviation from this. If the wind turns out to be 5 or 10 m/s then we can still teach the class as planned. When it comes to the time, then we prefer to start a class in the morning, but we may find that the wind first comes in the afternoon, or perhaps is it raining cats and dogs in the morning. Once again we have to adjust to current weather and wind forecasts.
The location where the course will take place depends on the wind direction and also on local variations in the wind strength. In Skåne the wind often comes from west, why Habo Ljung is a great spot for kite courses. When there are eastern or south-eastern winds then we move to Lundåkra. Sometimes there might be western winds, but too weak wind for Habo Ljung while Falsterbo delivers a bit more wind.
The conclusion is that a booking always is preliminary. Perhaps do you have the possibility to attend a course during a certain week, or during differents days/weekends? The more possibilities the higher chance for us to pick days with optimal conditions.
Gear
In case you do have a wetsuit or other equipment, then please bring it. If not don’t worry, we bring all the gear needed. We always ask for length and weight to be able to bring a wetsuit and harness in your size.
In case you still have a question, then don’t hesitate to reach out to us and we’ll get back to you asap!
Best regards!
/Gustav – IKO Instructor